Table of Contents
INTRODUCTION
Here’s a simple, friendly guide to help you install and use iMPlayer on your Firestick, Fire TV, or Android TV/Google TV Box!
What is iMPlayer?
iMPlayer is a popular IPTV player that works seamlessly with IPTV services offering M3U URLs or Xtream Codes API, making it a great choice alongside other players like TiviMate or IPTV Smarters. Be sure to check with your IPTV provider to confirm they provide an M3U URL before starting.
iMPlayer Premium Features
While the free version of iMPlayer is good, the premium version unlocks valuable features, including:
- Recording capabilities
- Adding channels to Favorites
- Catch-up and rewind options
- Multiview for watching multiple streams at once
- Channel locking for extra control
- Support for multiple playlists
- Customizable TV guides and manual channel sorting

Without premium, some features won’t be available, so consider trying the free app first to see if it’s a fit. If you like it, you can upgrade to premium for an enhanced experience.
How to Install iMPlayer
Follow the steps below to install iMPlayer on your streaming device and start enjoying your IPTV service in just minutes.
In this example, I am installing the iMPlayer app on an Amazon Firestick 4K. We must side-load this application due to the fact that it isn’t available inside the Amazon App Store.
1. Install the Downloader app from your respective App Store (Amazon App Store or Google Play) and turn on Apps from Unknown sources in the settings of your streaming device.
If you haven’t done this yet please refer to the following screenshot tutorial that demonstrates this simple process.
2. Launch Downloader.
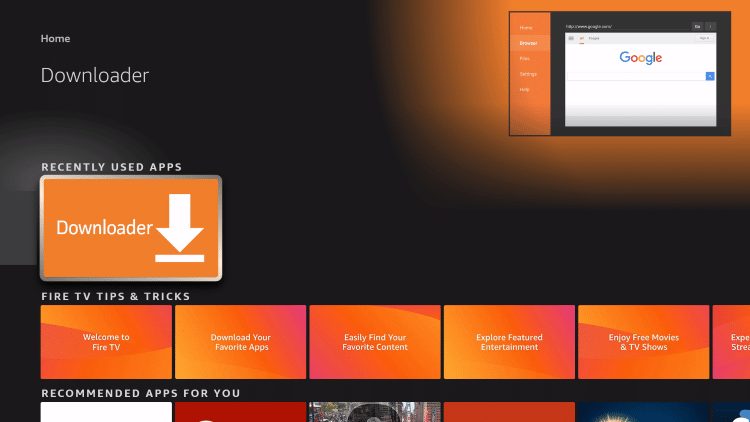
3. Click Allow.
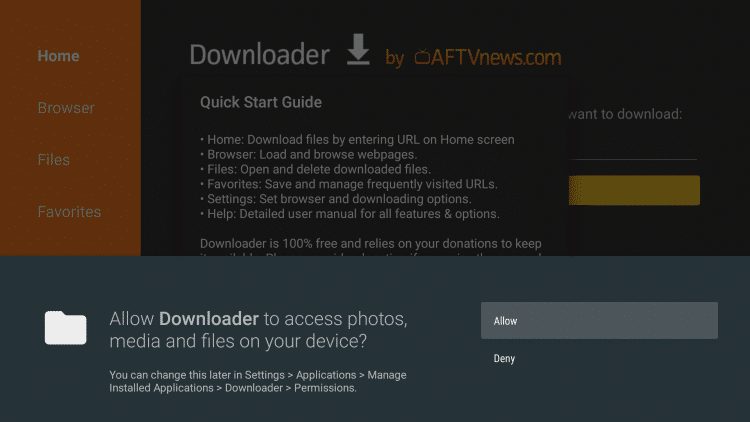
4. Click OK.
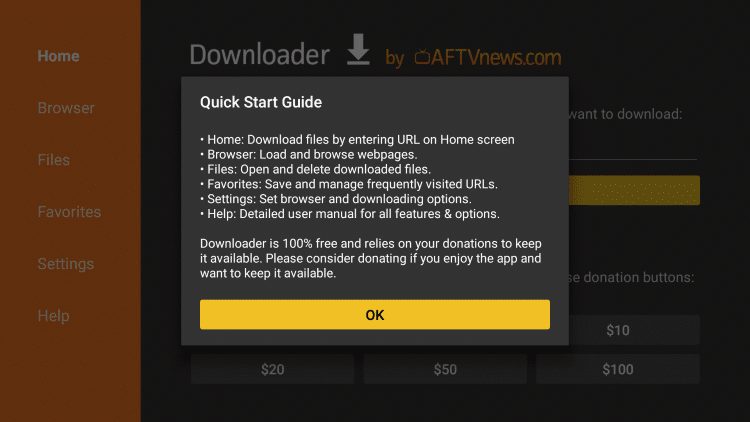
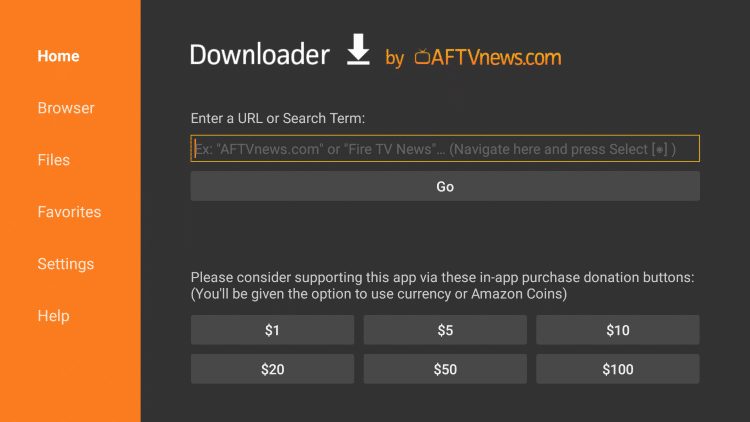
5. Place your cursor in the URL box and click the OK button on your remote to open the keyboard.
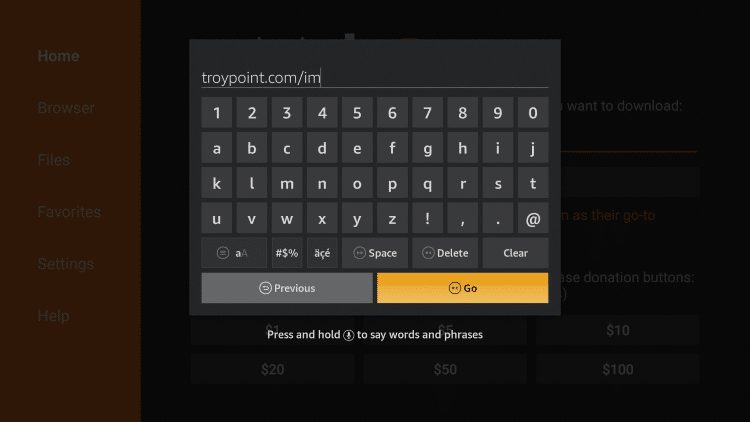
6. Type the following URL exactly as shown here: https://troypoint.com/im and click Go.
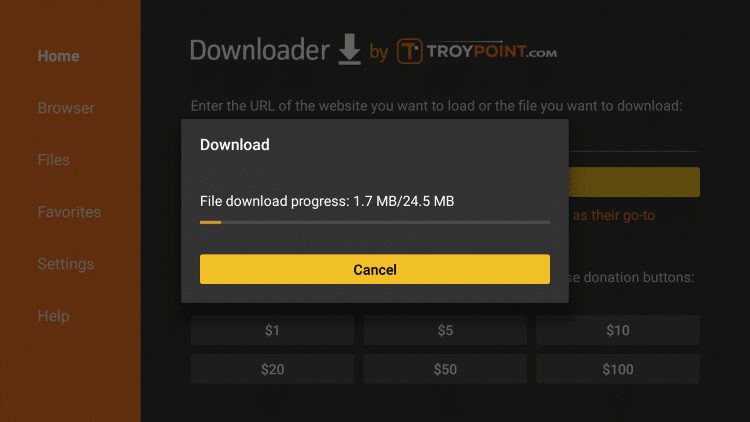
7. Wait for file to download.
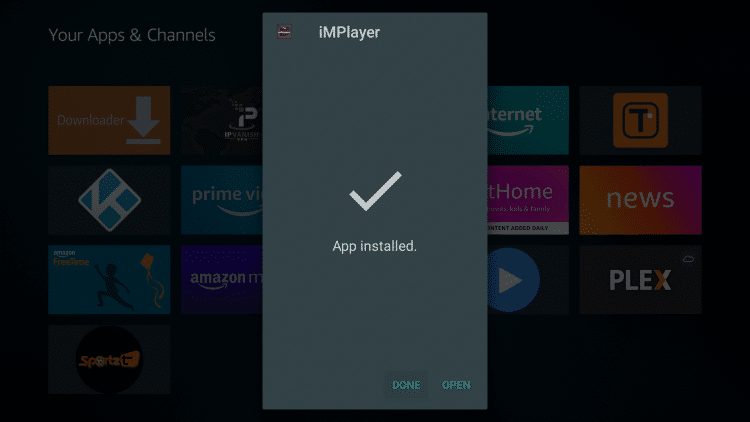
8. Click Install.
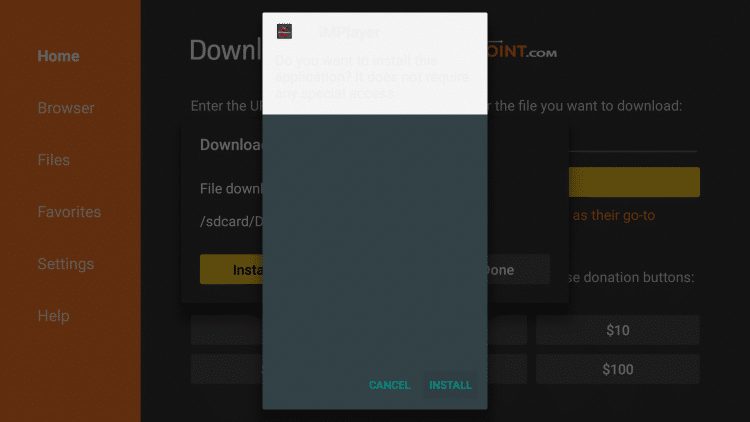
9. Click Done.
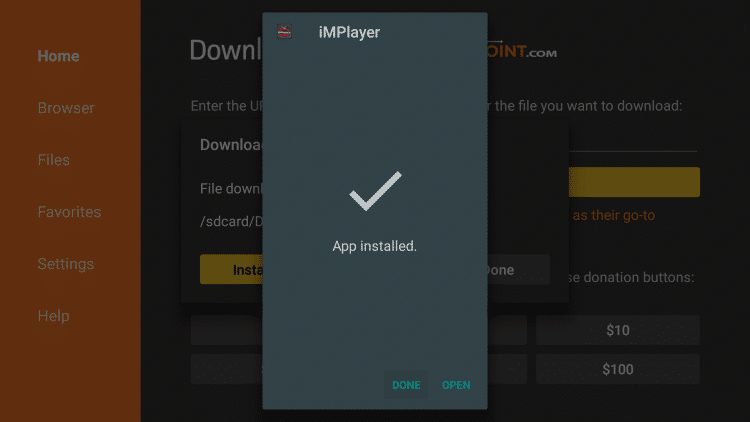
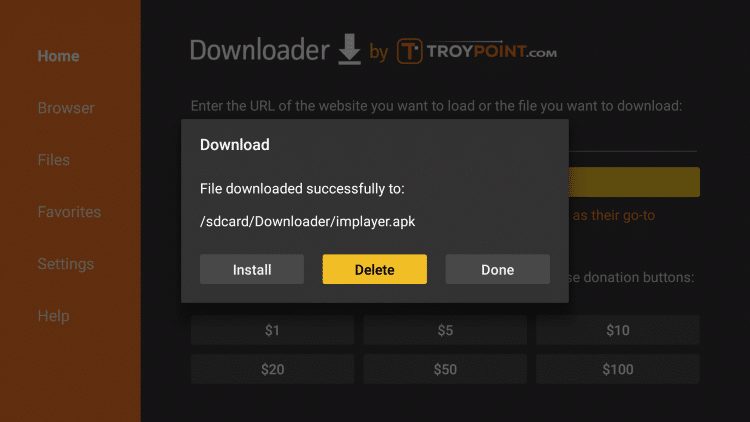
10. This will take you back to Downloader. Click Delete.
We won’t send you spam. Unsubscribe at any time.
11. Click Delete again.
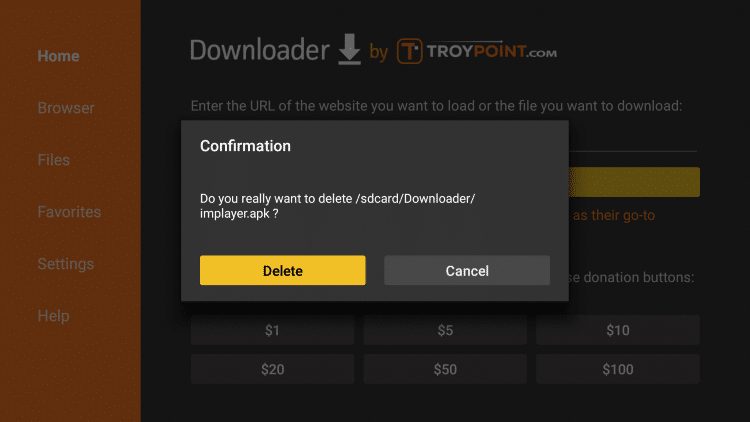
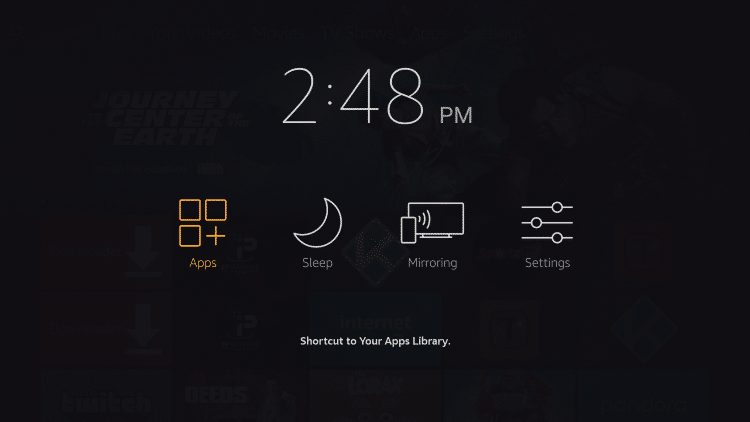
12. Hold down the home button on your remote and select Apps.
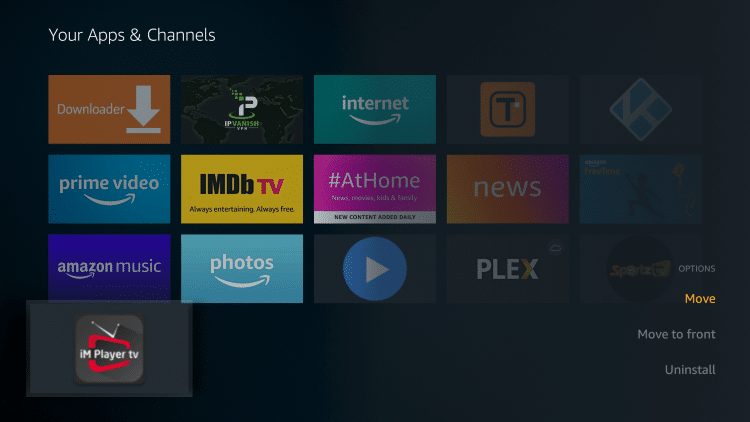
13. Scroll to the bottom and hover over iMPlayer. Click the Options button on your remote (three horizontal lines). Then select Move.
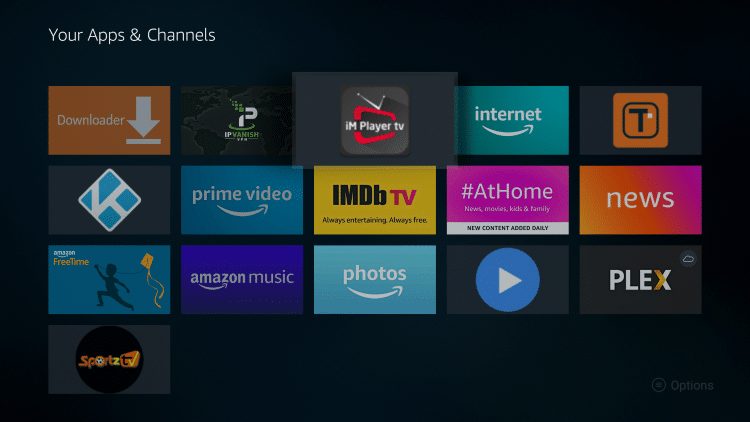
14. Drag iMPlayer to the top of your apps list and click to drop.
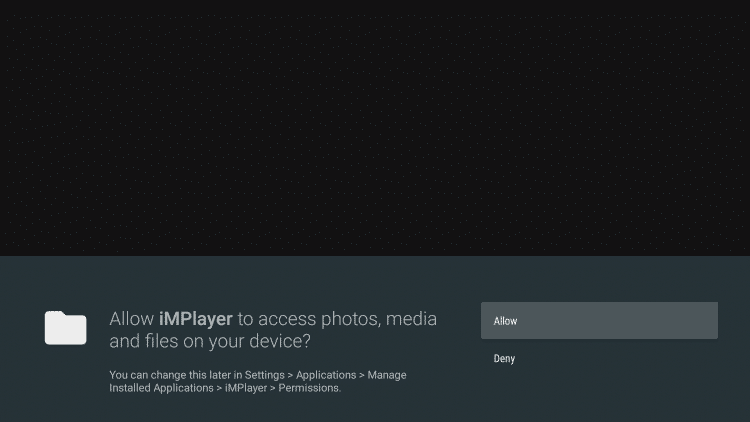
15. Launch iMPlayer and click Allow.
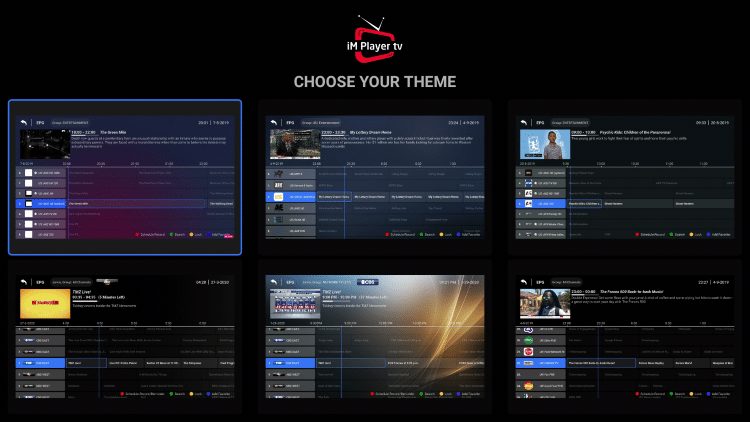
16. Choose whichever theme you prefer.
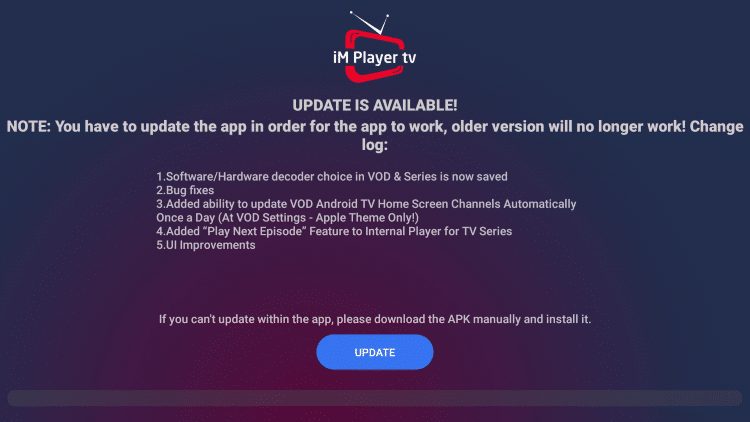
17. If prompted with an update click the Update button.
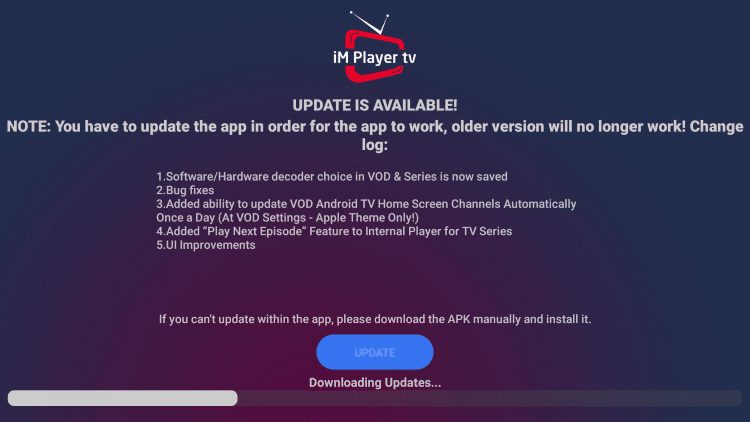
18. Wait a few seconds for iMPlayer to update.
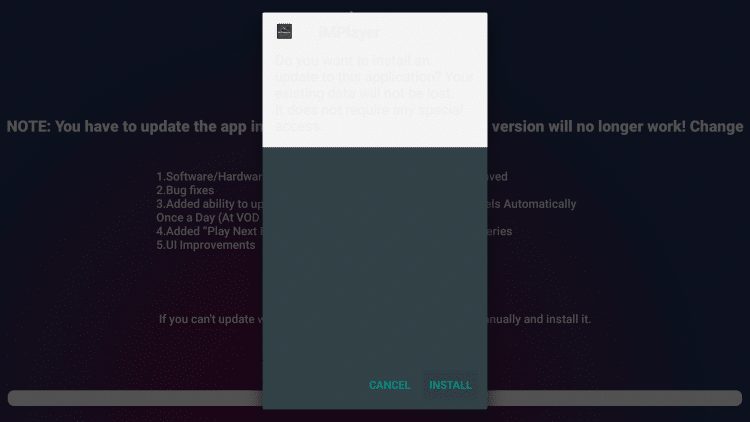
19. Click Install.
20. Click Done.
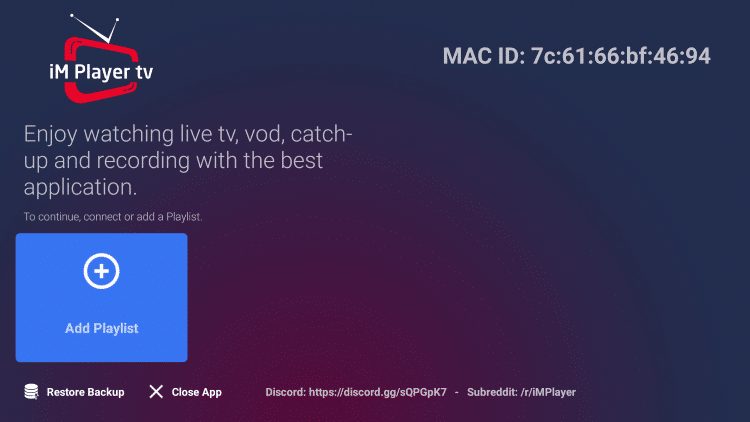
21. Relaunch the iMPlayer app.

22. That’s it! You have successfully installed iMPlayer. I suggest following further instructions below for setting up the IPTV player.
iMPlayer Setup
After installing the iMPlayer application on your device you will need to go through the setup process.
Follow our short guide below for setting up iMPlayer with your preferred IPTV service.
If you need an IPTV service, a simple search on YouTube or Google will provide you with hundreds of services to choose from.
1. On the home screen of iMPlayer click Add Playlist.

2. Once on this screen, you can either log in with an M3U URL or Xtreme Codes API.
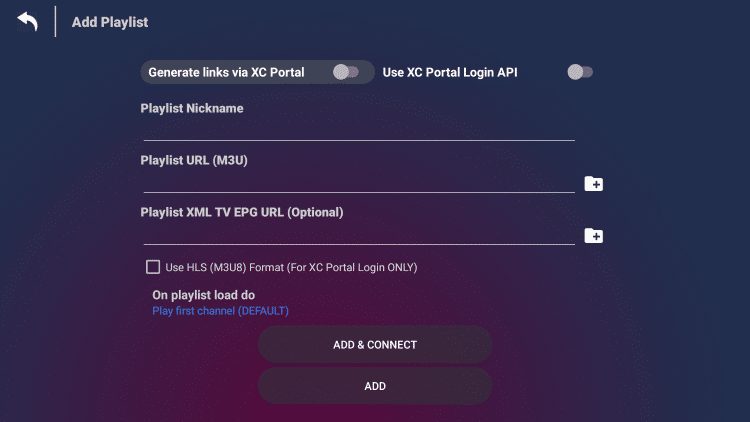
Because these M3U URL’s are so long to type, we recommend using an API or Xtream Code if applicable.
Most M3U URLs require that you input your service username and password. You will usually see where these go inside the URL as they are indicated by “username=xxxx” & password=xxxx”.
You will input your username and password where the x’s are located.
Here is an example of an M3U URL. This is not a real M3U URL but this is how the structure typically looks.
http://liveiptvservice.org:86/get.php?username=xxxx&password=xxxx&type=m3u_plus&output=ts
3. For this example, we are connecting our IPTV account with iMPlayer using the Xtreme Codes API. If using Xtreme Codes API hover over and click Use XC Portal Login API in the upper right.
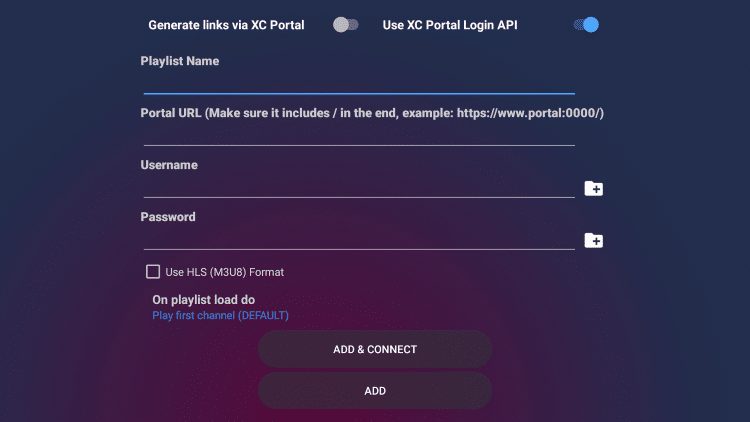
4. Enter in all of your account information and click Add & Connect.

5. Wait for the connection to your IPTV service to fully load.

6. If this message appears just click Close.

7. Click Close again.
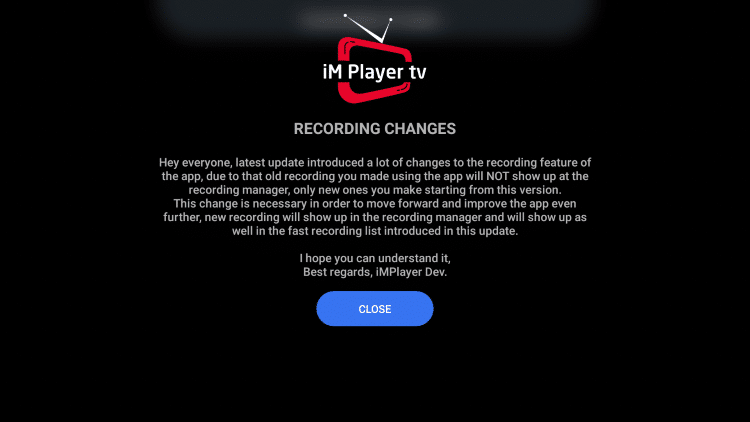
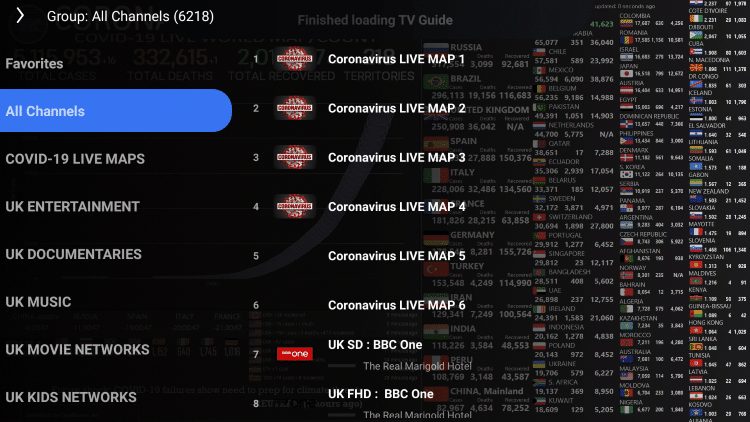
8. That’s it! You have successfully setup iMPlayer with your IPTV service.
Important Note: Many of the features within iMPlayer are not available for those who choose to use the free version.
For example, if you try adding a channel or channels to Favorites you will be prompted with the following message:
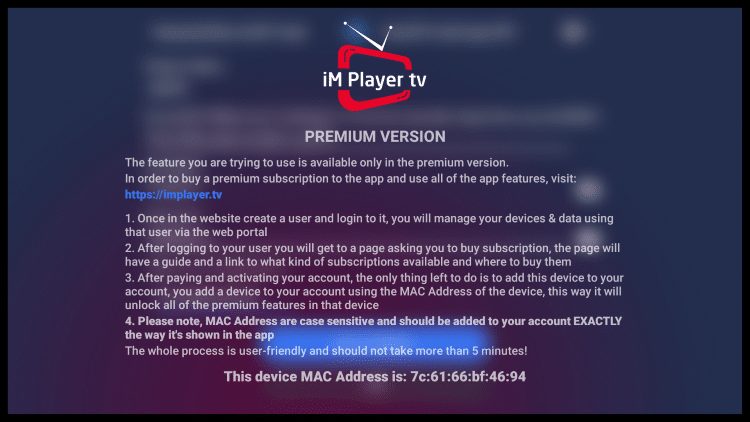
For those who wish to use the free version, simply click the back button on your remote to continue using iMPlayer.
If you purchase the premium option by using the website listed above – https://implayer.tv we can log in for added benefits.
If you need to create an account, you can follow the instructions below on how to do that.
How to Sign Up for iMPlayer Premium Version
1. Visit the following URL – https://implayer.tv
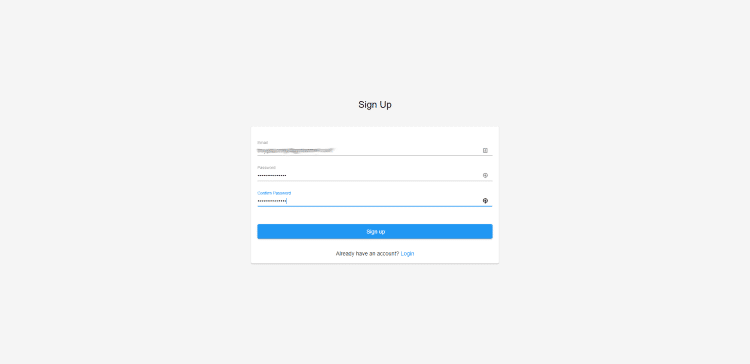
2. Click Sign up towards the bottom.
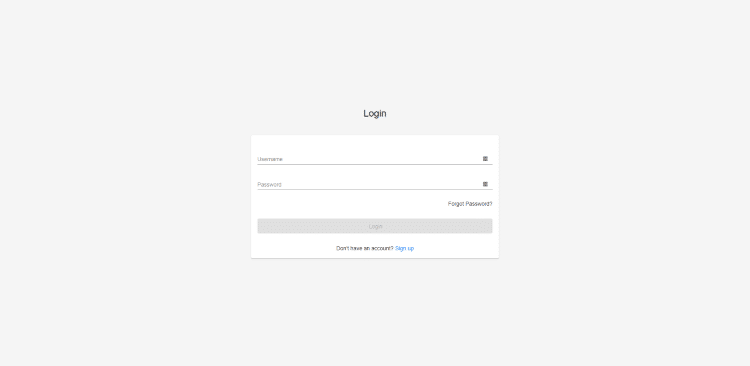
3. Enter in the required information (Email and Password) and click Sign up.
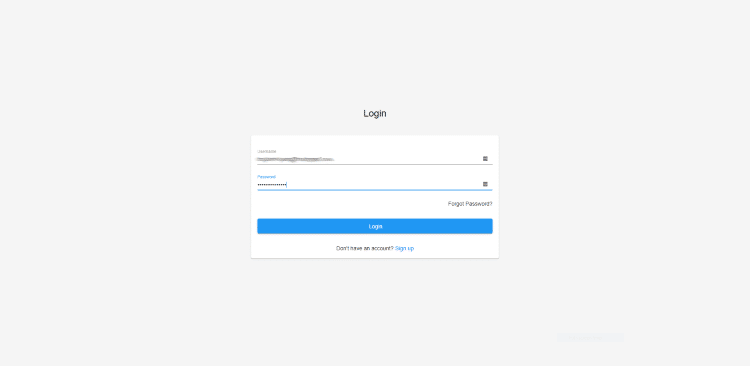
4. You are then directed back to the Login screen. Enter the same information you used to sign up and then click Login.
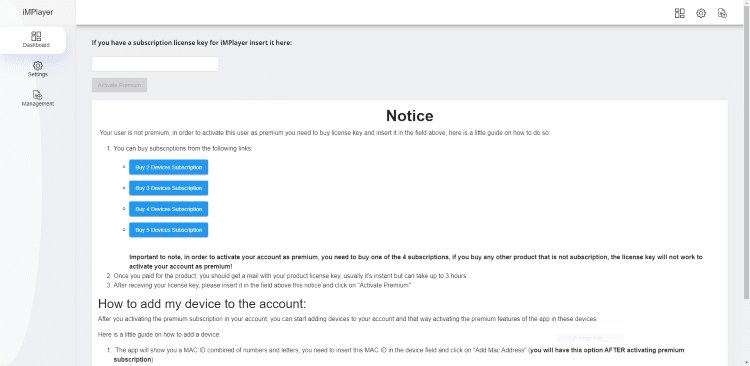
5. You are then directed to the iMPlayer dashboard. Notice the different subscription options available for 2, 3, 4, and 5 devices. Select whichever option you prefer.
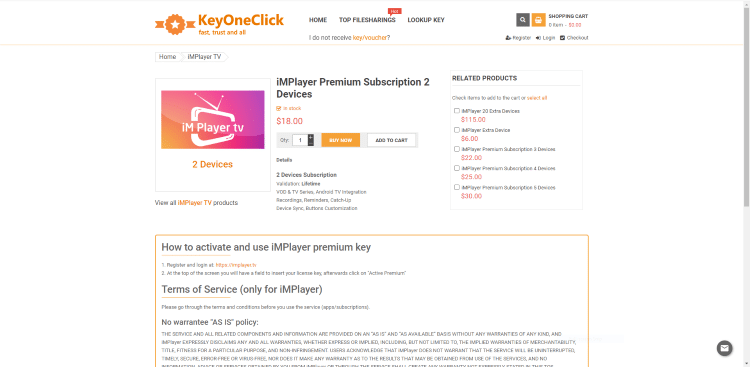
6. For this example, we chose the iMPlayer Premium Subscription 2 Devices option, which costs $18 as of this writing. Then click Buy Now.
7. Enter in your Email Address along with a Full name, choose a payment method, then click Place Order.
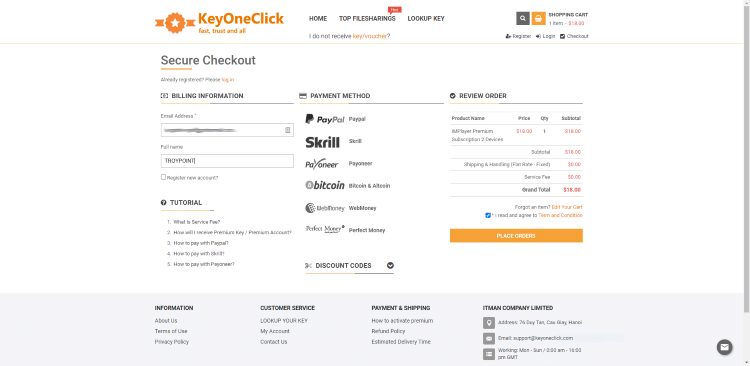
8. Review the information then select Click to Pay with PayPal (or whatever payment method you selected).
That’s it! After completing the payment you have now signed up for the iMPlayer Premium version.
Important Note: You will need to make note of your device’s MAC Address (or MAC ID) in order to successfully integrate your iMPlayer Premium account.
Add Channels to Favorites
The iMPlayer Premium Version also allows users to create a list of your favorite channels. See the quick screenshot guide below on how to add Favorites within the app.
1. Within the iMPlayer channel menu, select any channel you prefer.
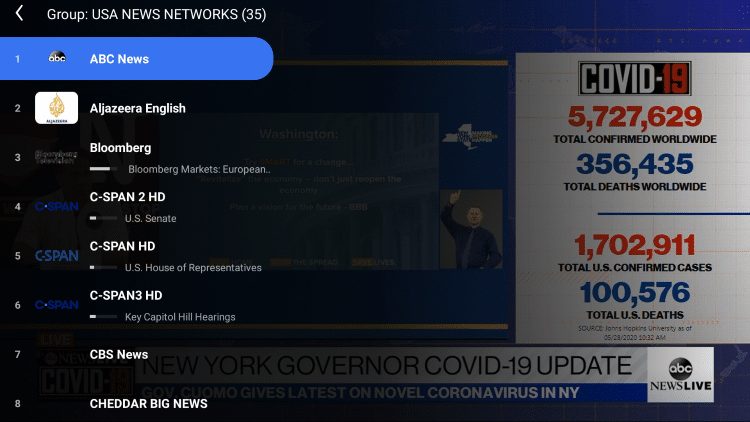
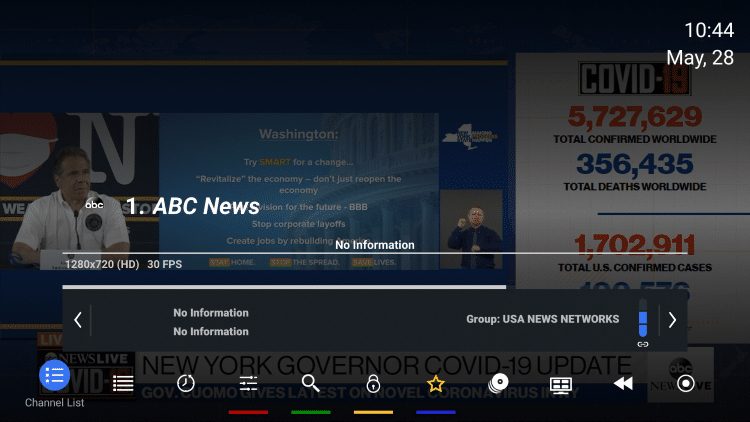
2. Press the OK button on your remote and you will notice the bottom menu appears.
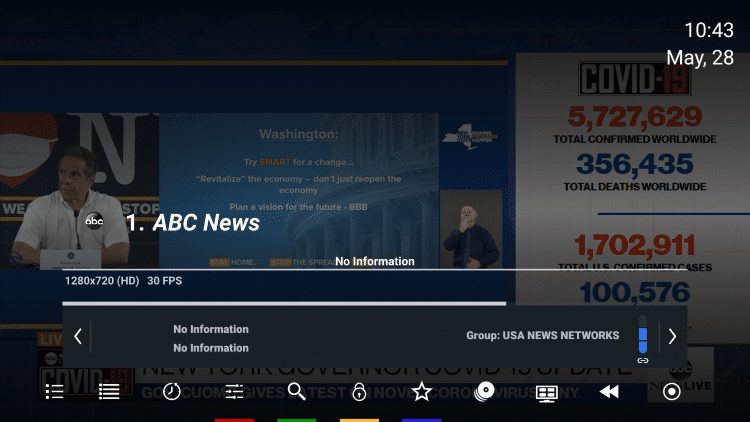
3. Locate the Favorites icon (star) and select it.

4. You will notice the Favorites icon turns to a gold color.
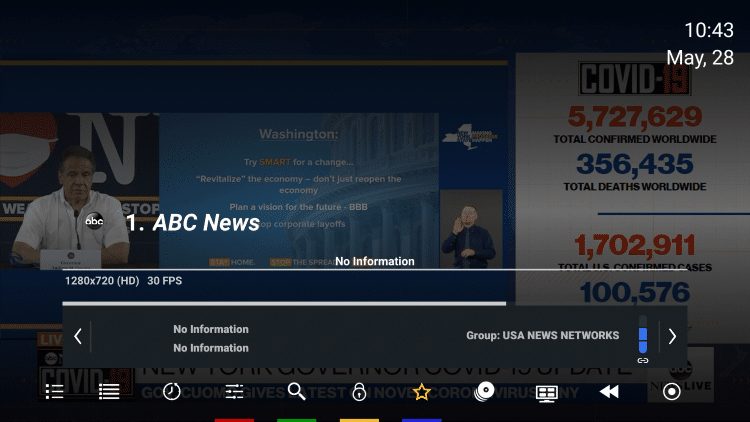
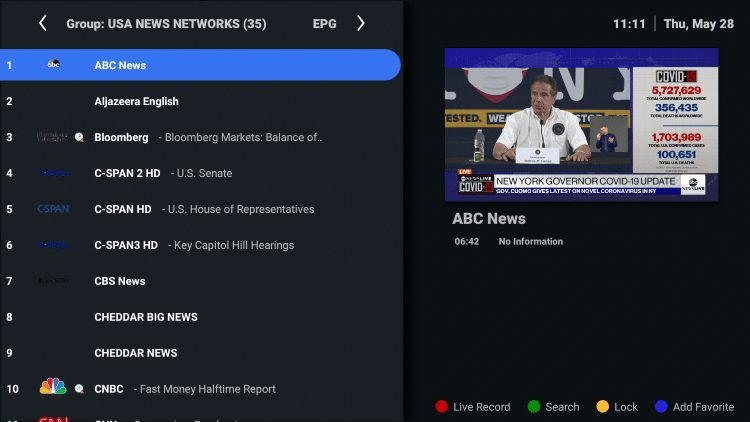
5. To locate your favorite channels, scroll left and select Channel List.
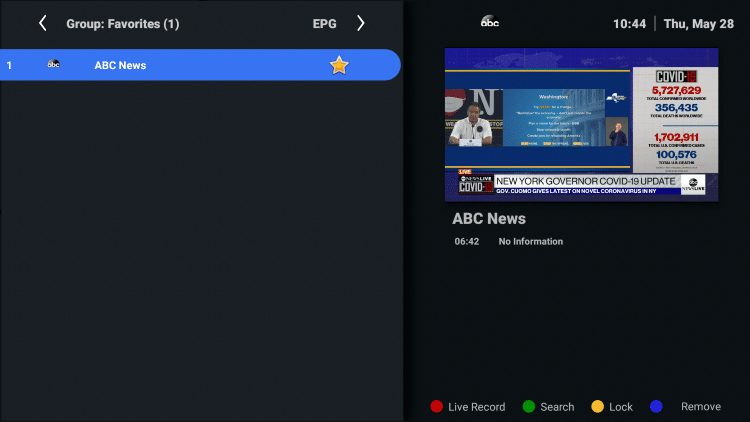
6. Within the left channel menu, scroll all the way up and select Favorites.

7. That’s it! Notice your selected channel is now located within your Favorites.
How to Record IPTV with iMPlayer
Another great feature included with the iMPlayer Premium version is the ability to Record Live TV.
Important Note: If you are using a Firestick or Android TV Box with minimal internal storage, we suggest using external storage to store IPTV recording files. We did this using an OTG Cable with a SanDisk USB 3.0 Flash Drive.
1. Within the iMPlayer channel menu, select any channel you prefer.
2. Click the OK button on your remote to launch the playback menu. Then scroll to the left and click Menu.
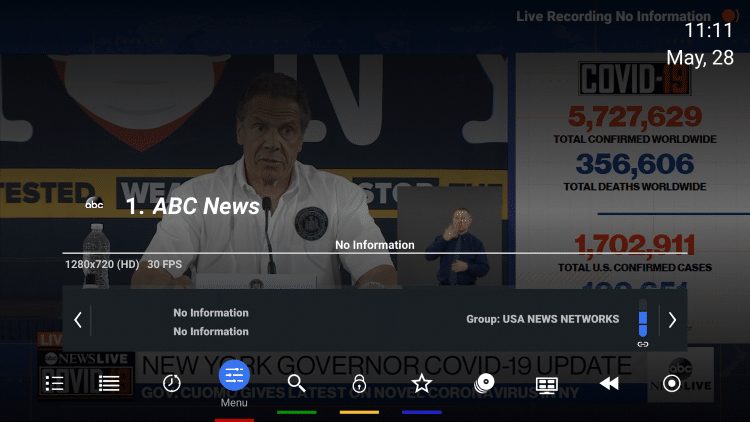
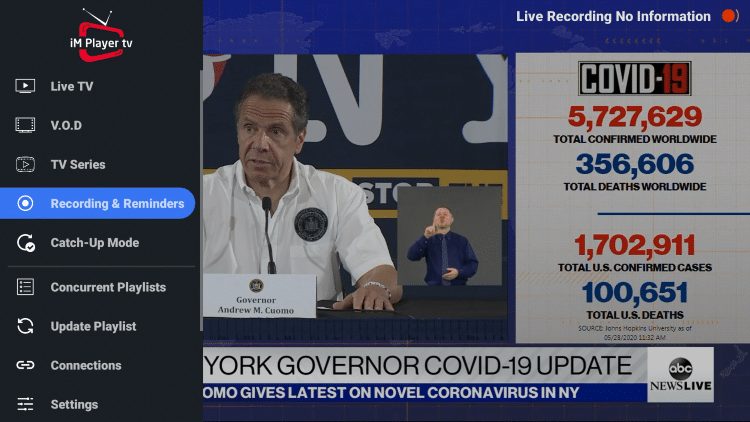
3. You will notice a menu appears on the left. Scroll down and select Recording & Reminders.
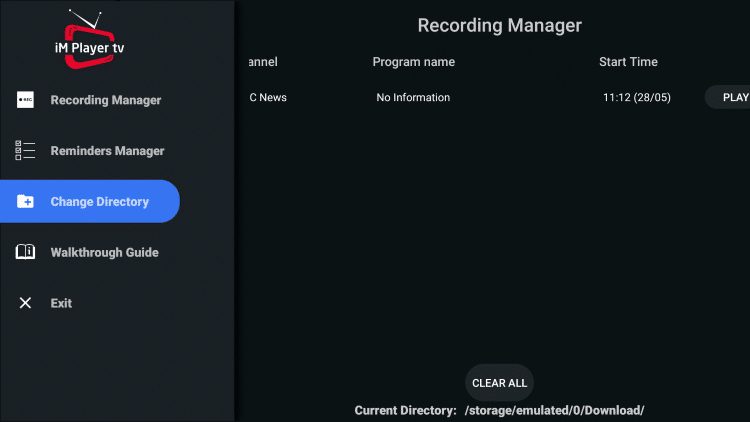
4. Then click Change Directory. This will allow you to save your recording files to the external USB storage.
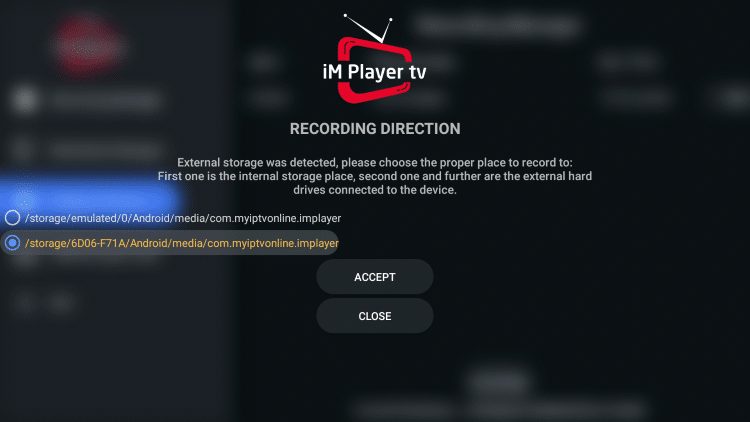
5. Click the second option that shows your external storage name.
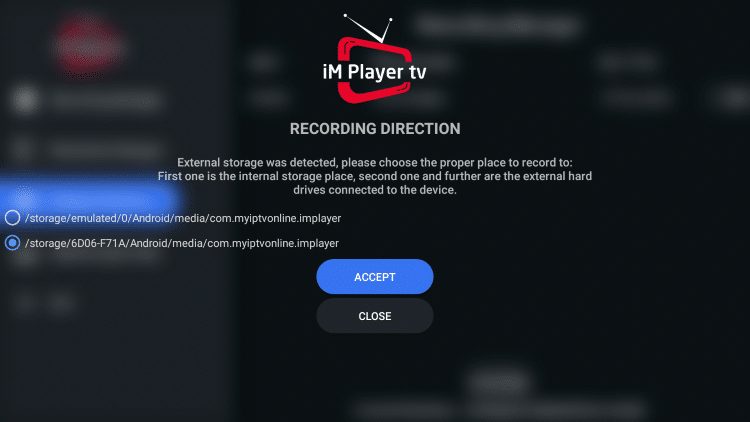
6. Then click Accept.
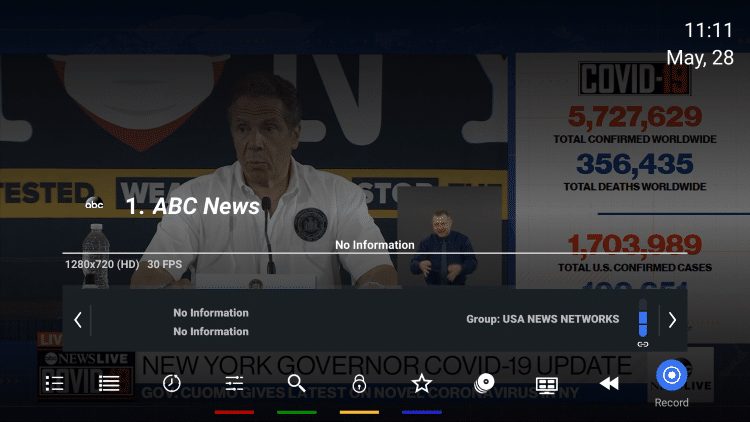
7. Return back to your selected channel and Click the OK button to launch the playback menu. Then scroll to the right and select Record.
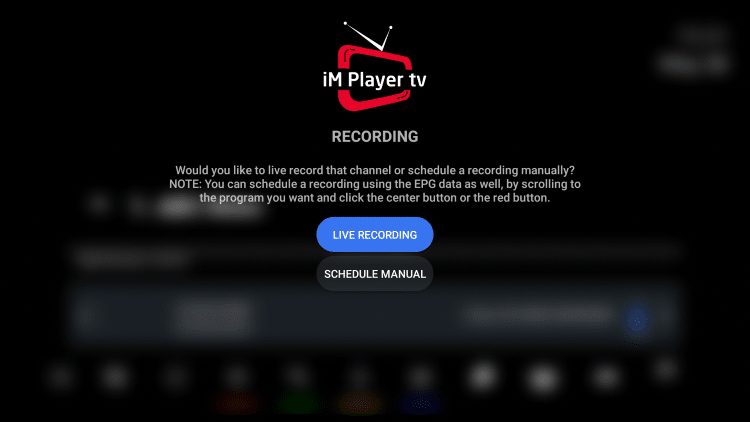
8. When this screen appears click Live Recording.
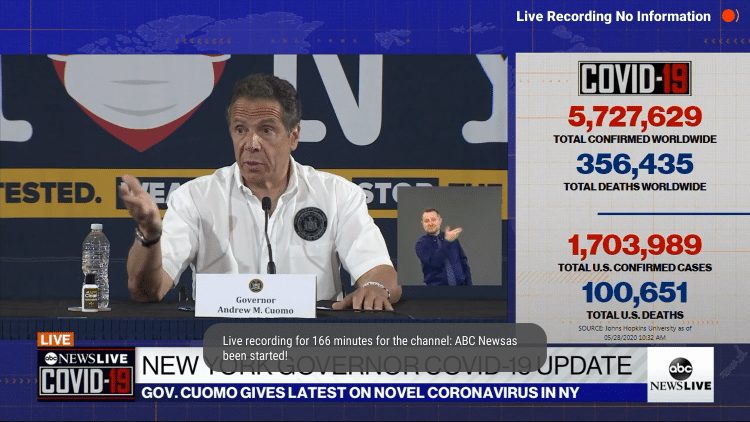
9. You will notice a message appear at the bottom saying your live recording has been started.
10. To view your recording, launch the playback menu again by clicking the OK button. Then select Menu.

11. Click Recording & Reminders.

12. Select Recording Manager.
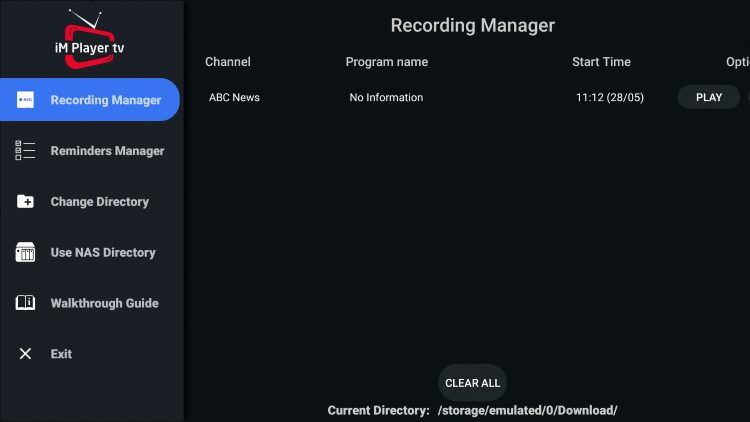
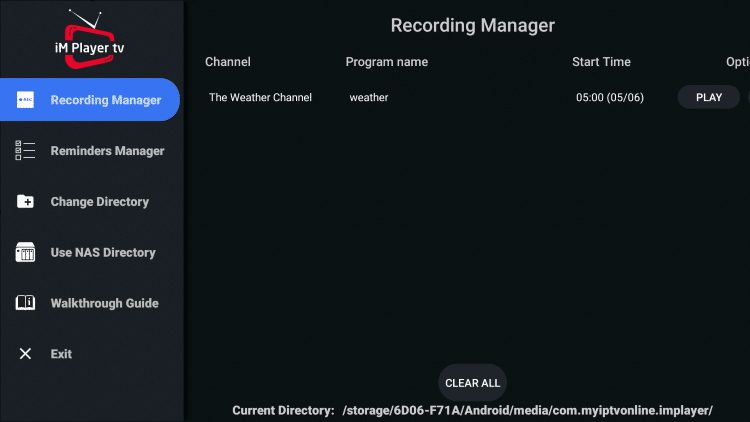
13. Within the Recording Manager, you are able to locate your recording files. Here you can play the recordings or remove them by clicking Clear All at the bottom.

That’s it! You now know how to record Live TV using iMPlayer.
How to Schedule Recordings
The best feature that sets iMPlayer apart from the other IPTV players is the ability to schedule recordings. This feature works great!
View the short screenshot guide below for how to schedule recordings within iMPlayer.
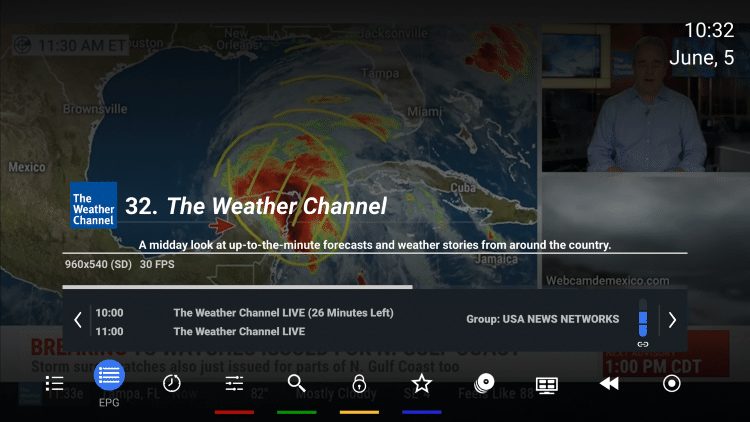
1. When viewing a channel, hit the OK button on your remote to open the playback menu. Select EPG.
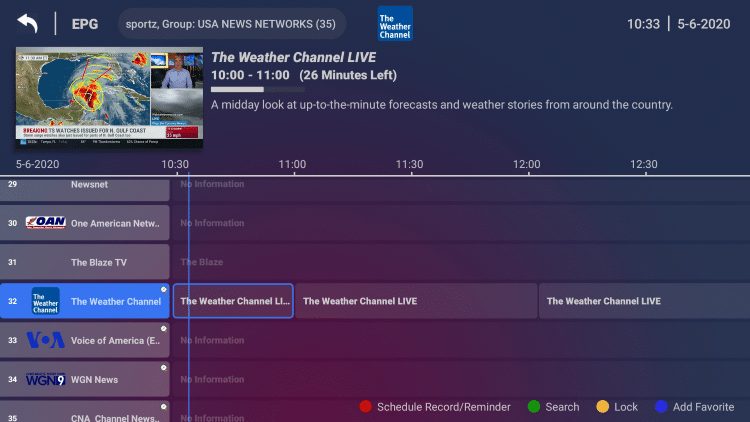
2. The EPG menu will then appear.
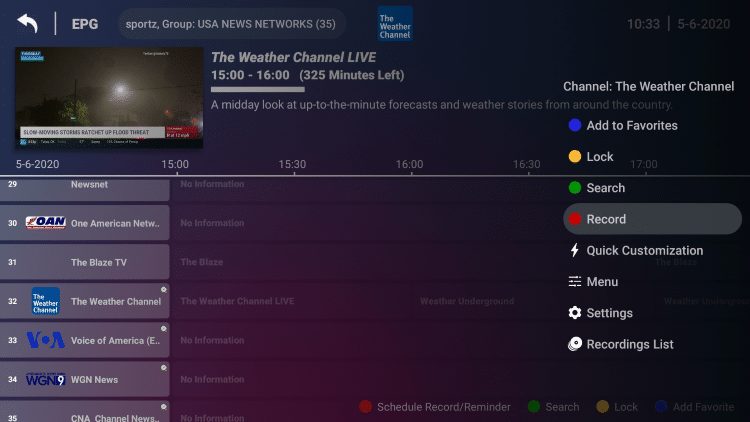
3. Hover over the channel you want to record and hold the OK button on your remote to launch the quick menu on the right. Then select Record.
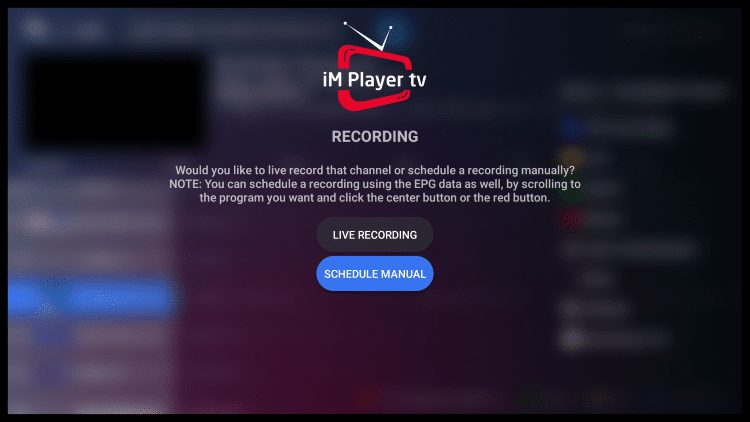
4. Choose Schedule Manual.
5. Next set your Manual Recording settings.
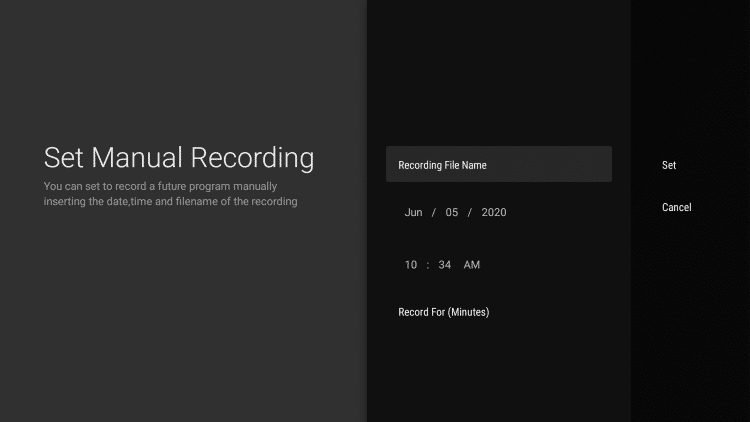
6. Enter a file name, date, time, and recording duration. Then click Set.

7. That’s it! You will notice a message saying “Recording for weather has been set!”
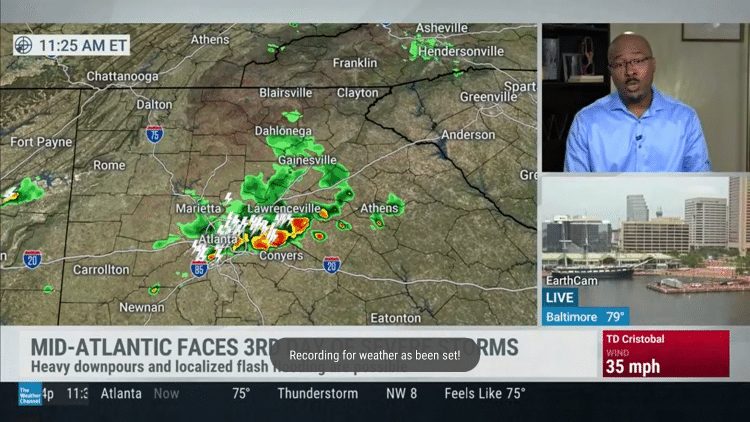
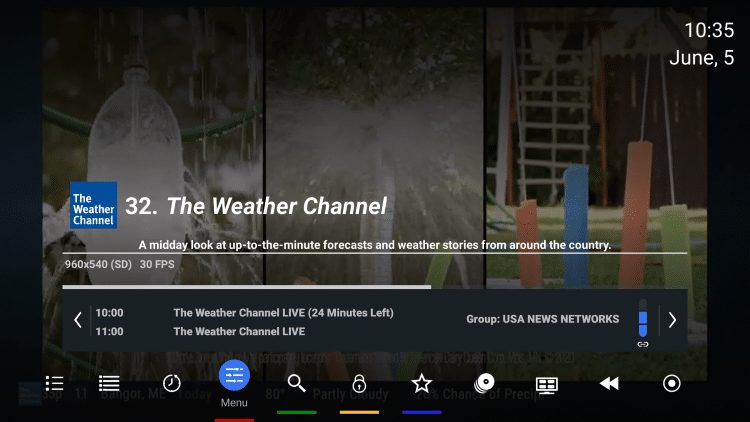
8. To view your scheduled recordings, return back to the playback menu and select the Menu option.
9. Select Recording & Reminders.
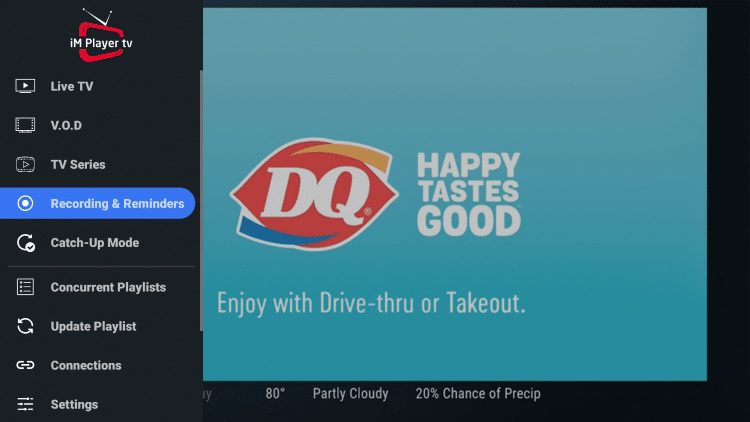
10. You will notice your scheduled recording appears within the Recording Manager.
iMPlayer Details & Features
After installing iMPlayer, you will notice the unique interface this IPTV player offers.
The menu bar on the left lists your Playlist Categories or “Groups” as they are referred to in the app. These can be hidden, removed, and managed all within the Settings.
This is a great way to eliminate any unwanted Channel lists that you don’t use or need.
Overall, iM Player is a great IPTV player that is compatible with the most popular IPTV services available. Give it a try today!

FAQs
1. What is iMPlayer?
- iM Player is an IPTV player designed for streaming live channels from IPTV services that offer M3U URLs or Xtream Codes API. It’s a versatile app, similar to other IPTV players like TiviMate and IPTV Smarters, allowing users to access live channels, VOD content, and more.
2. Does iMPlayer offer live channels?
- No, iM Player does not host or provide live channels. It simply serves as a platform for playing content from your IPTV provider, which you’ll need to set up with M3U or Xtream Codes.
3. What’s included in the iM Player Premium version?
- The premium version unlocks features like recording, channel favorites, catch-up, multi-view, customizable TV guides, channel locking, and support for multiple playlists.
4. How can I install iM Player on my device?
- iM Player isn’t available in the Amazon App Store, so you’ll need to side-load it using the Downloader app. Follow the guide to download the APK file and complete the installation.
5. Is iM Player free to use?
- Yes, iM Player offers a free version. However, premium features require a paid subscription.
6. How do I add channels or playlists to iM Player?
- After installation, you can add playlists by entering your IPTV provider’s M3U URL or using the Xtream Codes API in the app’s setup section.
7. Can I record shows and live TV with iM Player?
- Yes, iM Player Premium allows you to record live TV. You may need external storage if you’re using a Firestick or Android TV Box with limited space.
8. Does iM Player support scheduled recordings?
- Yes, the premium version includes a scheduled recording feature, which lets you set future recordings based on your preferences.
9. Can I customize channel groups in iM Player?
- Yes, you can hide, remove, or manage channel groups within the app’s settings for a more organized viewing experience.
10. How do I purchase iMPlayer Premium?
- Visit iM Player’s official website to sign up for premium. After registering, you can choose a subscription package and complete the purchase for added features.
11. Is iMPlayer compatible with multiple devices?
- Yes, iMPlayer Premium offers options to register multiple devices, with subscription plans covering 2 to 5 devices.
12. How do I access my favorite channels in iMPlayer?
- With iM Player Premium, you can add channels to a “Favorites” list. Select a channel, press OK, and choose the Favorites icon to add it.
13. Can I integrate multiple playlists in iMPlayer?
- Yes, iM Player Premium supports multiple playlists, making it easy to organize and switch between various channel lists.
14. Do I need to use an external player with iMPlayer?
- No, iM Player has a built-in player. However, if desired, you can try using an external player.
15. What should I do if my iMPlayer app doesn’t work correctly?
- Ensure you’ve installed the latest update and double-check your IPTV provider settings. You may also refer to iM Player’s support for assistance.
